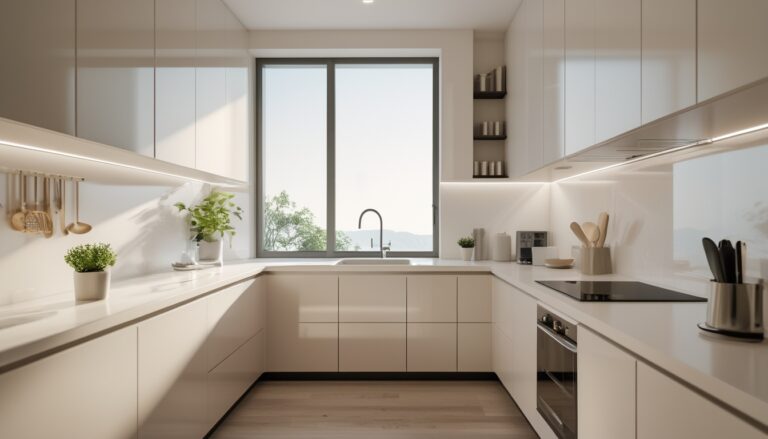

You want a kitchen that feels like a living room and performs like a chef’s workspace — a luxurious open space that balances beauty and daily comfort. A well-designed luxury open space kitchen merges clean sightlines, premium materials, and smart planning so your space feels expansive, cohesive, and effortlessly usable. This article will show how to achieve that balance through layout, materials, lighting, furniture, and smart systems.
Expect practical design moves that create flow between cooking, dining, and lounging areas while preserving intimacy and functionality. You’ll learn which materials and colors convey elegance, how appliances and furniture support both style and use, lighting strategies that sculpt mood, and quick solutions to common layout challenges.
Defining a Luxury Open Space Kitchen
You want a kitchen that feels integrated with living areas while delivering high-end performance, clear circulation, and a cohesive visual vocabulary. Focus on durable materials, deliberate spatial planning, and lighting that supports cooking and socializing.
Core Characteristics of Luxurious Open Kitchens
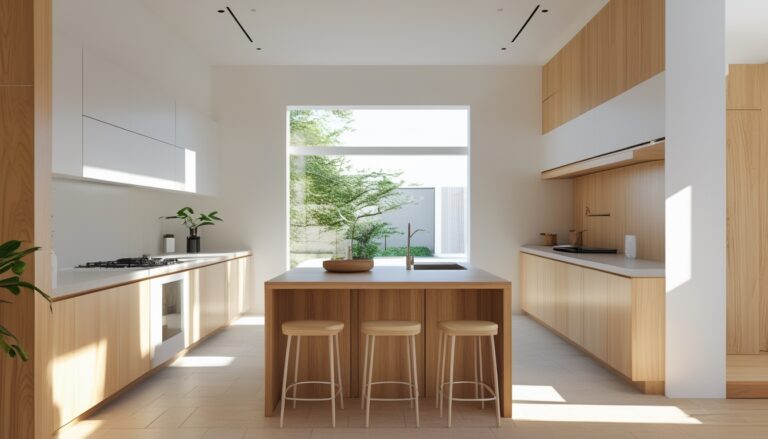
Luxury open kitchens prioritize function without hiding it. You should plan distinct work zones—cooking, prep, cleaning, and storage—so multiple people can work without crossing paths. Install a spacious island with a deep sink or integrated cooktop to anchor the room and serve as both workspace and social counter.
High-performance appliances matter: look for 36″+ ranges, integrated refrigeration, and quiet dishwashers with full-extension drawers. Storage must be intentional—tall pantries, pull-out trays, and appliance garages keep clutter concealed. Flooring should be continuous and resilient (large-format porcelain, engineered wood), reducing visual breaks and improving flow between kitchen and living areas.
Aesthetic Principles in Open Space Design
You must create a consistent material palette to unify adjoining spaces. Choose three primary materials—countertop, cabinet finish, and flooring—and repeat them across the plan to maintain cohesion. Use a restrained color scheme: a dominant neutral, a secondary tone for contrast, and one accent for small elements like barstools or backsplash tile.
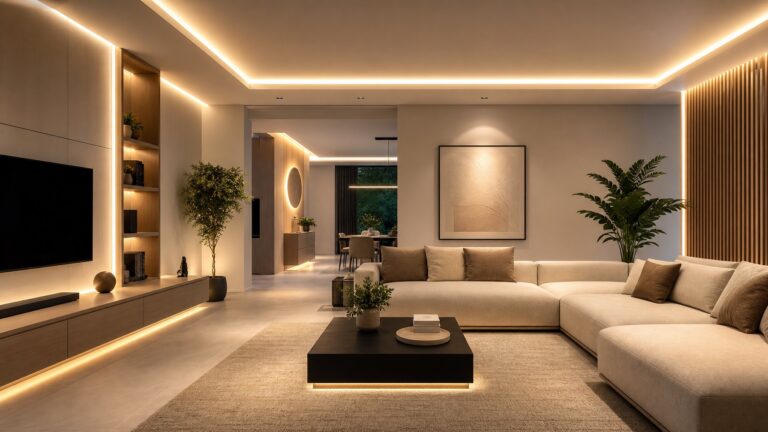
Textures add depth without noise: matte cabinetry, honed stone counters, and a subtle patterned tile can balance each other. Lighting plays an aesthetic role—layer ambient ceiling fixtures, task lighting under cabinets, and pendant lighting over islands. Keep sightlines clear by aligning tall elements like refrigerators with doorways or framing them within cabinetry runs.
Balancing Comfort and Visual Appeal
Comfort combines ergonomics, acoustics, and social seating. Set counter heights to suit your primary cooks, and include at least 36 inches of clear aisle space around islands for comfortable circulation. Offer varied seating—casual stools at the island and a small banquette or lounge chair nearby—to support different activities.
Address noise with soft surfaces: area rugs in adjacent living zones, fabric-upholstered chairs, and sound-absorbing ceiling panels if needed. Temperature control matters—position ventilation to capture cooking fumes without disturbing conversation. Finally, integrate practical lighting controls and task-specific fixtures so you can shift the mood from food prep to entertaining with a single switch.
Key Design Elements for Openness and Harmony
Focus on spatial connections, uninterrupted sightlines, and environmental control to create a luxurious yet livable open-space kitchen. Prioritize functional zoning, consistent materials, and abundant daylight while controlling odors and sound.
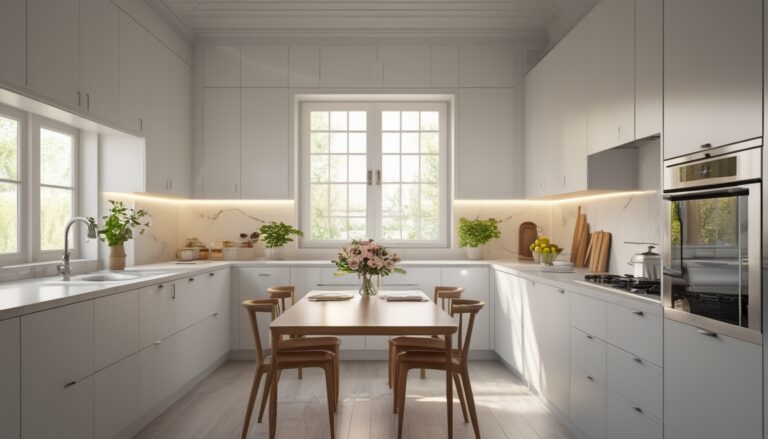
Integration of Kitchen, Dining, and Living Areas
Define functions with low-profile separators rather than full walls to keep visual continuity. Use an island or peninsula as a multifunctional anchor: cooking zone, prep surface, casual dining, and a transition to the living area. Place seating on the living side to encourage interaction without blocking workflow.
Match countertop and cabinet finishes with adjacent furniture to create a cohesive palette. Keep major circulation paths (at least 90–100 cm) between island and seating to prevent bottlenecks. Position major appliances so the “work triangle” (sink, cooktop, fridge) remains efficient but out of direct sight from the main seating area when possible.
Use consistent flooring and aligned sightlines to make the space feel larger. Add a rug or different ceiling treatment over the living area to signal a change of use without interrupting openness.
Optimal Space Layout and Flow
Start by mapping typical movement: cooking, serving, entertaining, and cleanup. Arrange zones so serving paths to the dining table are direct and unobstructed. Keep the prep area adjacent to an accessible dishwasher and trash pull-out for smooth cleanup.
Prioritize storage near use points—pots near the cooktop, plates near the dishwasher, and pantry items close to the fridge. Adopt tall cabinets along one wall and lower, open shelving near the living area to balance storage capacity with visual lightness.
Plan lighting and sightlines together: sightlines should allow conversation across areas, while task lighting must support focused work in the kitchen. Maintain a minimum 2.4–2.7 m ceiling height where possible to enhance air circulation and perceived space.
Natural Light and Ventilation Strategies
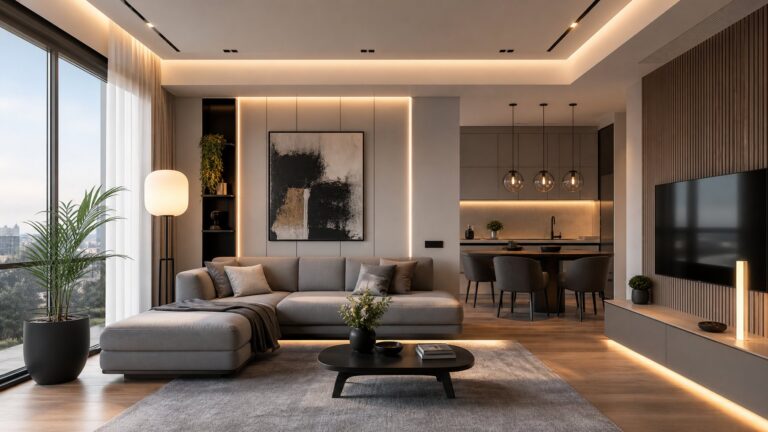
Maximize daylight with large windows, sliding glass doors, or clerestories positioned to illuminate both the kitchen and living areas. Place the primary prep zone near the brightest opening to reduce reliance on artificial lighting during daytime.
Use cross-ventilation where possible: align operable windows or doors on opposite sides, and add a high-level vent or transom to expel hot air. Specify a high-efficiency range hood sized to the cooktop (at least the width of the cooking surface) and duct it outside to control odors and grease.
Incorporate indoor plants and operable shading (blinds or motorized shades) to moderate glare and improve air quality. Consider heat-reflective glazing or low-E glass to limit solar gain while preserving views.
Material and Color Selections for Elegance
Select durable premium materials, coordinate a restrained palette that enlarges sightlines, and choose flooring and surfaces that balance sheen with warmth to unify open-plan spaces.
Choosing High-End Finishes
Pick materials that hold up to cooking wear while signaling quality. Use honed or bookmatched marble for island countertops to create a focal point; pair with matte lacquered cabinetry to reduce glare and fingerprints. For cabinet hardware, choose solid brass or stainless steel with satin finishes—these age well and resist smudges.
Specify integrated appliances with stainless or panel-ready faces to keep visual lines uninterrupted. Use semi-recessed sinks and under-mounted drains to simplify cleaning and preserve edge detail. Prioritize finishes rated for kitchen use: low-porosity stone, heat-resistant composite, and water-resistant veneers.
Color Palettes to Enhance Spaciousness
Aim for a three-tone strategy: primary neutral, accent tone, and a deep grounding color. For example, soft warm white (primary) on walls, muted greige or sage (accent) on lower cabinets, and charcoal (grounding) on the island base. This combination keeps the room airy while adding depth.
Use reflective mid-tones sparingly—backsplash tiles with subtle sheen or a satin ceiling paint—to bounce light across the open plan. Keep vertical joinery and tall units in the lightest tone to maintain perceived height. Limit bright, saturated colors to small movable elements like bar stools or cookware for flexible visual interest.
Surfaces and Flooring That Elevate the Atmosphere
Choose continuous flooring across kitchen and adjacent living area to visually expand the open space. Engineered hardwood in a wide-plank, matte finish delivers warmth and hides seams; large-format porcelain tiles that mimic stone provide high durability and easy maintenance.
On counters and backsplashes, select materials with low-maintenance surfaces: quartz for uniform patterning and stain resistance, or sealed honed stone where you want natural veining. Use rugs or runner mats with low pile in work zones to protect floors and define pathways without breaking the visual flow.
Furniture and Appliance Choices
Choose appliances that combine performance with quiet operation, and pick furniture that creates visual continuity between kitchen and living areas. Prioritize durable finishes, matched materials, and storage solutions that keep counters clear.
Luxury Appliances for Seamless Functionality
Select built-in refrigerators and dishwashers to maintain uninterrupted sightlines across your open space. Look for 24–36 inch column refrigerators with panel-ready fronts so the unit blends with cabinetry; models with dual compressors help preserve food longer and reduce odor transfer.
Prioritize a cooktop with precise temperature control — induction is efficient, low-heat, and safe when guests are present. Add a low-profile, high-extraction hood to prevent cooking smells from drifting into seating areas.
Consider integrated ovens and steam ovens installed at ergonomic heights to limit bending. Choose quiet, high-efficiency dishwashers (44–46 dB) and a dedicated wine refrigerator or beverage center if you entertain often.
Furniture Selection for Cohesive Design
Anchor the space with a kitchen island that doubles as a casual dining surface; specify a 36–42 inch counter height for seating comfort. Use the same wood tone or veneer on island panels and living-room media units to visually link zones.
Pick sofas and dining chairs with stain-resistant upholstery if the kitchen sees heavy use. Opt for low-back seating near the island to preserve sightlines and maintain a spacious feeling.
Match metal finishes on cabinet hardware, faucet, and lighting fixtures to create a cohesive palette. Introduce a single accent color through seat cushions or a rug to unify the room without overwhelming the neutral base.
Custom Cabinetry and Shelving Solutions
Invest in full-height, custom cabinetry to maximize vertical storage and conceal appliances like microwave ovens and trash bins. Specify internal pull-out trays, deep drawers for pots, and vertical dividers for baking sheets to keep items accessible and out of view.
Include open shelving sparingly for display items; restrict shelves to 12–15 inches deep and use concealed under-shelf lighting to highlight curated pieces. Use soft-close hinges and drawer slides rated for heavy loads to ensure longevity.
Plan a pantry with adjustable shelving and dedicated zones (dry goods, small appliances, cleaning supplies). Consider panel-ready appliance fronts and integrated charging stations inside cabinets to maintain a clean, uncluttered surface aesthetic.
Lighting Concepts to Accentuate Style
Use layered lighting to define zones, enhance finishes, and support tasks. Combine broad ambient sources, targeted task lights, and one or two bold fixtures to create depth and visual hierarchy.
Ambient Lighting Techniques
Ambient light provides the base illumination that keeps the open-plan kitchen comfortable and cohesive. Install recessed LED downlights on a 600–900 mm grid for even coverage; choose 2700–3000K for warm, inviting tones that pair well with wood and warm stone. Use dimmable drivers tied to a central control so you can shift brightness for cooking, dining, or relaxing without changing fixtures.
Consider concealed cove or perimeter LED strips under upper cabinets or inside a soffit to wash walls and ceilings. Specify high CRI (90+) LEDs to preserve true color of countertops and finishes. For very long open spaces, break the runs into zones controlled separately to avoid a single overly bright strip dominating the room.
Accent and Task Lighting Placement
Place task lights directly over work surfaces where you prepare food: pendants or linear LEDs over the island, under-cabinet strips along counters, and adjustable fixtures above the stove or sink. Keep task illumination around 300–500 lux on countertops for safe, comfortable prep work. Angle under-cabinet lighting slightly forward to reduce glare and shadows.
Use accent lights to highlight material changes or display areas. Small adjustable recessed spots or mini-track heads work well to illuminate a textured backsplash, open shelving, or a decorative wall. Position these lights with narrow beam angles (15°–30°) and lower lumen output than task lights so they create contrast without competing.
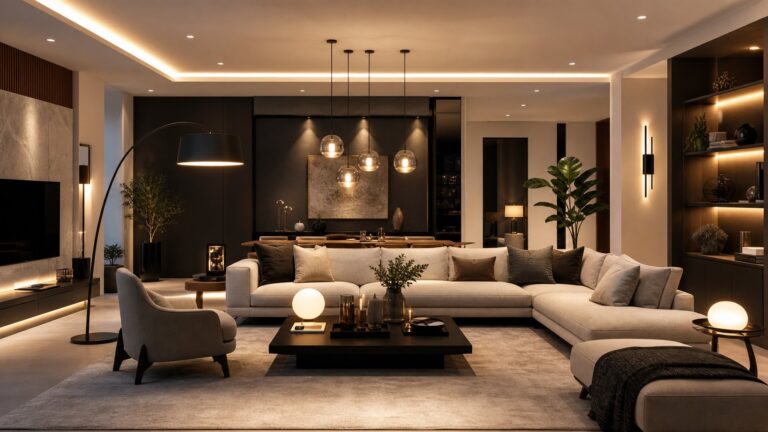
Statement Fixtures as Focal Points
Choose one or two statement fixtures to anchor dining and island zones visually. Over the island, a linear chandelier or a row of oversized pendants creates scale and rhythm; over the dining table, a sculptural pendant defines the eating area in an open plan. Match the fixture finish to your kitchen hardware (brass, matte black, or chrome) for a cohesive look.
Keep proportions in mind: pendants should sit 65–80 cm above the island surface and span roughly two-thirds the island’s length when clustered. For ceilings higher than 3.2 m, raise fixtures and increase scale so they read from across the living space. Integrate a dedicated dimmer for these fixtures to shift emphasis between function and mood.
Decorative Details and Personalization
Choose finishes and accents that reflect your taste while supporting the open layout’s flow. Prioritize durable, easy-to-clean materials and pick focal pieces that bridge kitchen and living areas for a cohesive look.
Artwork and Wall Treatments
Select art and wall finishes that read well from multiple vantage points in the open space. Large-scale paintings or a curated gallery wall near the dining area draw the eye without cluttering sightlines; keep frames consistent in color or material to maintain unity. Consider textured wall treatments—veneer panels, plaster, or durable wallpaper—behind a stove or along a shared wall to add depth while resisting kitchen humidity.
Mount art at a slightly higher height where kitchen counters meet seating so pieces remain visible from both cooking and lounging zones. Use moisture-resistant sealants for any wall treatment used close to splatter zones. For metallic or mirrored accents, place them to reflect natural light and visually expand the shared room without creating glare at work surfaces.
Signature Decorative Accessories
Choose a few high-impact accessories that function as both decor and practical objects. A sculptural fruit bowl, brass utensil holder, or artisanal cutting board on the island becomes a focal point and supports everyday use. Anchor the living-side aesthetic with a statement rug that delineates the seating area while tolerating foot traffic and occasional spills—select low-pile, stain-resistant fibers.
Group accessories in odd numbers on open shelving or console tables to create balanced vignettes. Use coordinated metals—brushed gold, matte black, or polished chrome—across lighting, hardware, and smallwares to tie the kitchen and living areas together. Rotate seasonal accents like fresh greenery or ceramic pitchers to refresh the space without large renovations.
Smart Solutions for Enhanced Comfort
You can boost comfort by automating climate, lighting, and ventilation while keeping clutter out of sight with tailored storage. Focus on systems that simplify daily routines and storage that adapts to how you cook and entertain.
Integrating Smart Home Systems
Install a central hub that supports Zigbee or Z‑Wave and Wi‑Fi so you can link the oven, hood, lighting, thermostat, and speakers on one app. Program scenes such as “Cooking” to set vent fan to medium, under-cabinet lights to 70%, and the range hood to boost when smoke is detected.
Choose smart appliances with scheduling and remote monitoring: a connected oven that notifies you when preheat is done, and a refrigerator that alerts for door open or temperature rise.
Use smart sensors for comfort and safety. Motion sensors trigger pathway lights at night. Air-quality sensors automatically increase ventilation when VOCs or humidity rise from cooking. Ensure voice control and tactile overrides (physical switches) remain available for guests and quick manual use.
Innovative Storage Options
Prioritize drawer systems sized to your cookware: deep drawers for pots with soft‑close slides, shallow cutlery trays, and adjustable dividers for lids. Keep frequently used tools in a 300–400 mm deep pull‑out next to the range for one‑hand access while cooking.
Integrate a pantry with sliding shelves or tilt‑out trays to maintain visibility and prevent items from getting lost at the back. Use vertical dividers for baking sheets and cutting boards to save horizontal space.
Add concealed, multifunctional storage near social zones. A peninsula or island can house recycling bins, a built‑in microwave drawer, and open shelving for display. Use labeled, transparent containers for dry goods to speed meal prep and maintain a tidy visual flow in the open space.
Common Challenges and Pro Tips
Open-plan kitchens can struggle with cooking odors and noise bleeding into adjacent living areas. Use a high-capacity range hood and consider sound-absorbing materials such as acoustic panels, rugs, and upholstered furniture to reduce reverberation.
Maintaining visual harmony between kitchen and living spaces demands deliberate color and material choices. Pick a limited palette and repeat one or two materials—like a countertop finish or wood tone—so the transition feels intentional rather than scattered.
Storage often becomes an issue when walls disappear. Prioritize tall cabinets, drawer organizers, and multifunctional furniture such as an island with built-in storage to keep clutter out of sight while keeping essentials accessible.
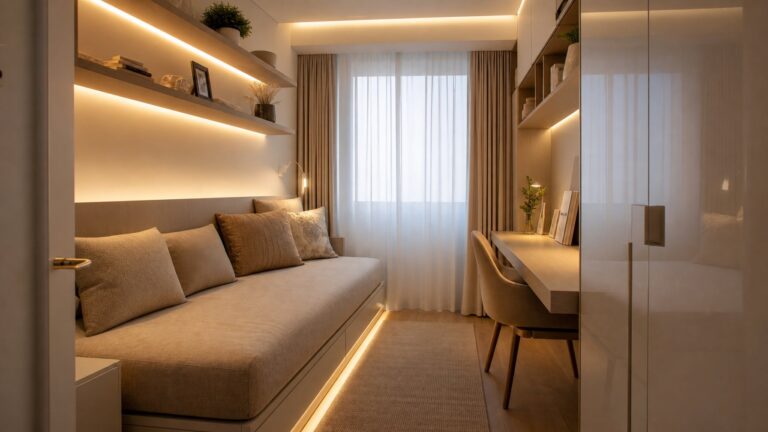
Privacy and zoning matter when you host or need focused tasks. Create subtle zones with a rug, pendant lighting, or a change in ceiling treatment; these visual cues define function without erecting walls.
Traffic flow can be compromised by poorly placed islands or seating. Leave clear circulation paths of at least 90–120 cm (35–47 inches) around workstations and between island and counters to prevent bottlenecks during meal prep.
Budget constraints can limit your choices. Allocate more of your budget to durable, visible surfaces (countertops, flooring) and save on decorative elements that are easier to update later.
Quick checklist:
- Ventilation: powerful hood + fresh-air path
- Acoustics: soft textiles + absorptive panels
- Storage: vertical cabinets + organized drawers
- Zoning: rugs, lighting, and material shifts
- Flow: maintain 90–120 cm clearances
These tactics keep your open kitchen both elegant and practical while preserving the sense of connected space.