You deserve a kitchen that feels both luxurious and effortless—one that pairs high-end materials with a layout that actually supports how you cook and entertain. You’ll learn concrete design choices and spatial strategies that make a kitchen look premium while functioning optimally for daily use and special gatherings.
This article walks you through how to choose layouts, finishes, and smart technology that elevate style without sacrificing practicality. Expect clear guidance on planning circulation, selecting lasting materials, integrating appliances, and tailoring the space to your lifestyle so your kitchen becomes a true centerpiece of your home.
Understanding Luxury Kitchen Design
Luxury kitchens prioritize thoughtful layout, premium materials, precise lighting, and appliances that match your cooking needs. These elements shape a space that looks refined while supporting efficient meal preparation and entertaining.
Key Characteristics of a Luxury Kitchen
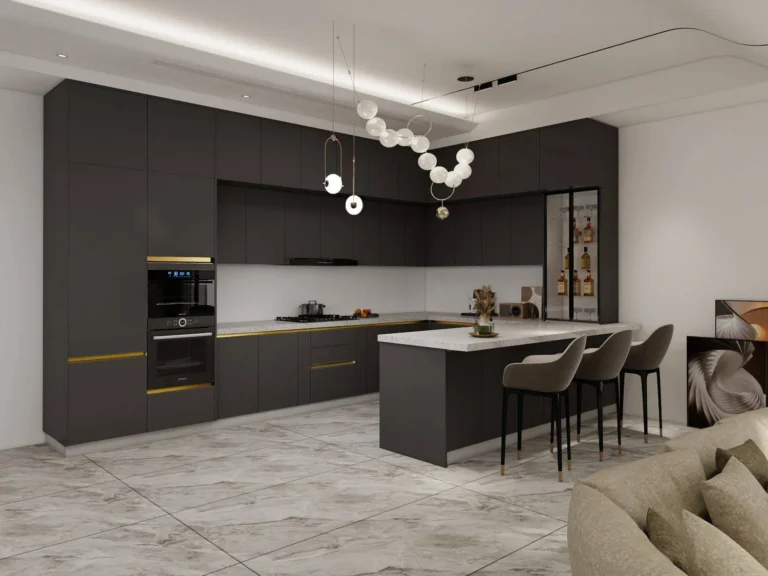
A luxury kitchen centers on scale, proportion, and uninterrupted workflow. Expect generous clearances—at least 120 cm between islands and countertops—to allow multiple cooks to work without crowding. Storage goes beyond cabinets: integrate full-height pantries, appliance garages, and dedicated zones for prep, cooking, and cleanup to keep surfaces uncluttered.
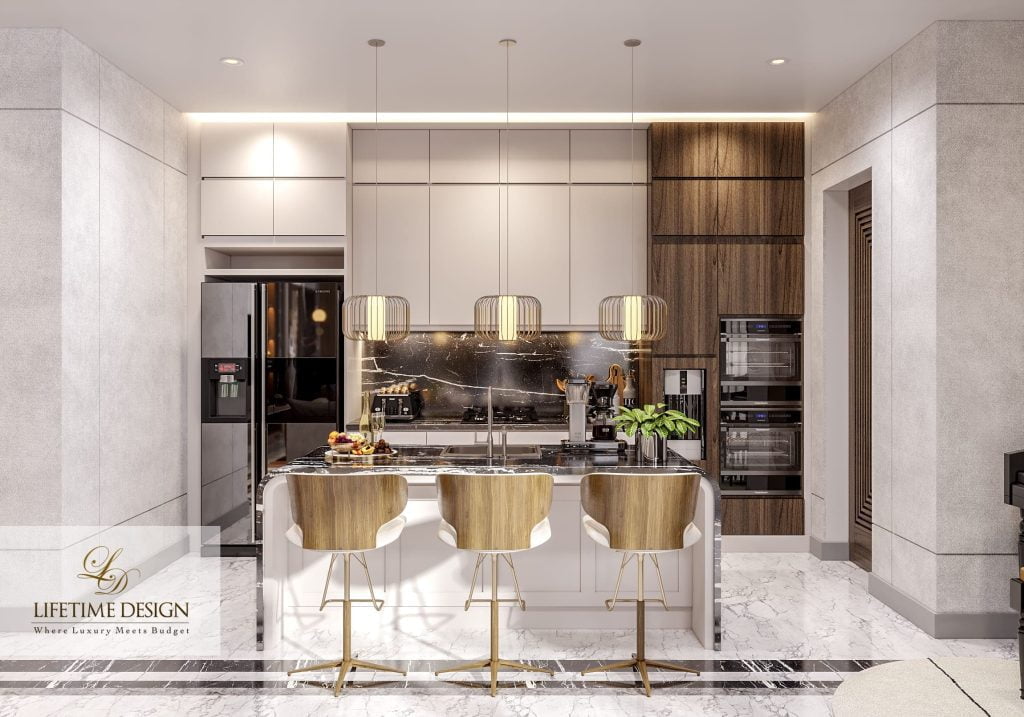
Appliances should match both capacity and finish: professional-range burners with 5–6 burners, built-in double ovens, and a 36–48 inch refrigerator create utility and visual balance. Lighting combines layered task, accent, and ambient sources—under-cabinet LEDs for counters, pendant lighting over islands, and dimmable ceiling fixtures for mood control. Finally, circulation to adjoining rooms matters; plan clear sightlines and at least one wide passage (90–100 cm) to connect kitchen, dining, and service areas.
The Role of High-End Materials
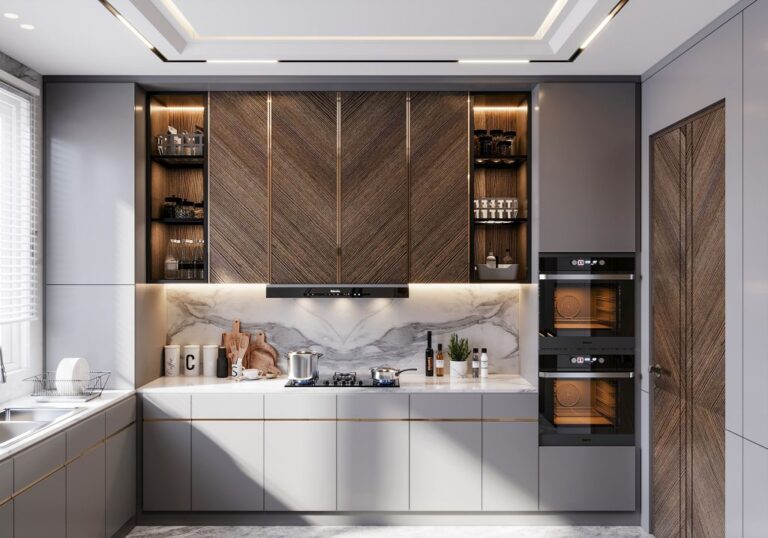
Materials define the tactile and visual quality of your kitchen while affecting durability and maintenance. Choose natural stone like Calacatta or marble for statement counters where heat and stain resistance are managed; quartz offers low-maintenance alternatives with consistent veining. Hardwood or large-format porcelain tiles work for floors — oak planks for warmth, porcelain for heavy-traffic resilience.
Cabinet fronts benefit from solid wood, lacquered MDF, or metal-clad panels depending on desired finish and cost. Use high-quality hardware: soft-close hinges, full-extension drawers, and integrated organizers improve longevity and daily use. For backsplashes and accent walls, consider honed stone, glass mosaics, or stainless steel for easy cleaning. Sealants and edge treatments matter—opt for factory-sealed joints and eased or eased-and-beveled edges to resist chipping.
Blending Aesthetics and Functionality
Balance visual decisions with practical needs to ensure the kitchen performs under real use. If you choose an open-plan layout, invest in integrated ventilation (custom hood or downdraft) to protect adjacent living areas from odors and grease. Coordinate finishes: matte cabinet surfaces reduce visible fingerprints near sinks and handles, while glossy accents highlight light and reflectivity in darker rooms.
Design ergonomics around your daily routines. Place commonly used items within 45–90 cm of workstations. Install task-specific features like a secondary prep sink on a long island, a dedicated baking drawer near the oven, or a beverage station with a built-in espresso machine and under-counter refrigeration. Finally, choose lighting color temperatures (2700–3500K) that flatter materials and provide accurate color rendering for food prep.
Optimal Kitchen Layouts for Luxury Homes
Choose layouts that balance visual impact, smooth circulation, and distinct work zones. Focus on sightlines, appliance placement, and clear walking paths to support both high-end entertaining and everyday cooking.
Open Concept Versus Enclosed Spaces
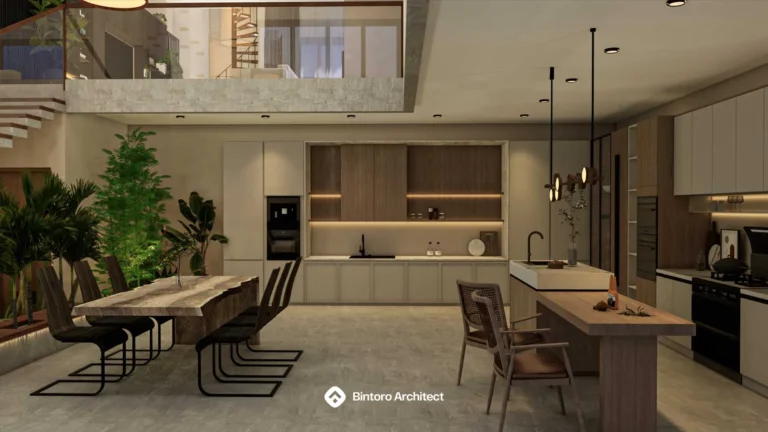
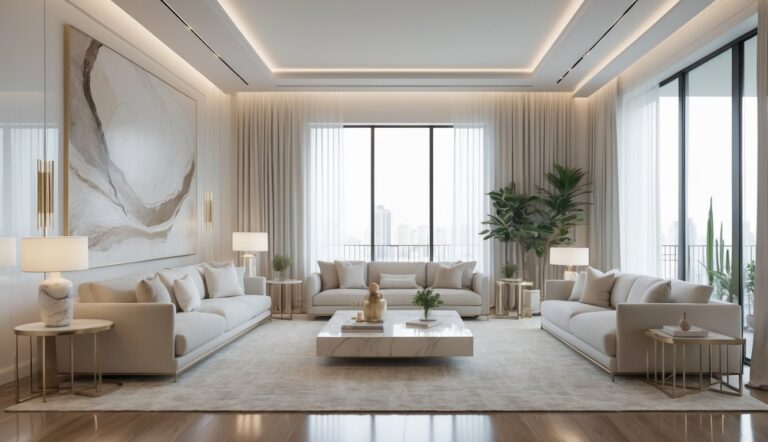
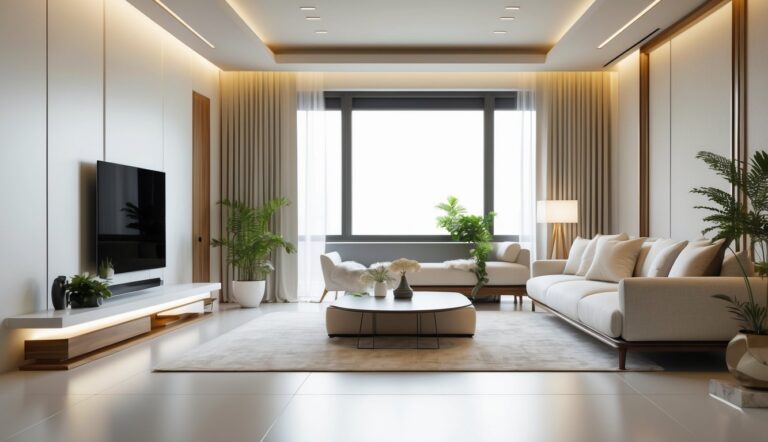
Open-concept kitchens create a continuous visual flow between the kitchen, dining, and living areas. You gain entertaining flexibility, larger sightlines for guests, and the ability to showcase a statement island or premium cabinetry. Plan for concealed storage and integrated appliances so clutter doesn’t dominate the open view.
Enclosed or semi-enclosed kitchens keep cooking odors and noise contained, which benefits serious cooks and multi-tier households. Use pocket doors, glass partitions, or a butler’s pantry to preserve openness while providing separation when needed. Ensure mechanical ventilation and strong lighting to maintain a luxurious feel even with doors closed.
Island Placement and Traffic Flow
Position the island to preserve a minimum 42–48 inches (107–122 cm) of clearance on primary traffic sides; increase to 48–54 inches (122–137 cm) near heavy prep or cooking zones. That clearance keeps traffic moving during meal service and prevents collisions when multiple people cook.
Align island features—sink, cooktop, or seating—with workflow. Place a prep sink opposite the primary sink or cooktop to create parallel workstations. If you include seating, set the counter overhang to 12–15 inches (30–38 cm) and keep the seating zone clear of the main traffic path to avoid congestion during gatherings.
Zoning for Cooking, Prep, and Entertaining
Define three core zones: cooking (range/oven), prep (countertops and sinks), and entertaining (island seating, beverage center). Keep the cooking zone within 18–36 inches (46–91 cm) of major prep surfaces to shorten transfer distances for hot pans and ingredients.
Install task lighting and durable surfaces in the prep zone for heavy use. Design the entertaining zone with integrated refrigeration, a beverage drawer, and accessible trash/recycle to serve guests without crossing active cooking areas. Use different materials or a change in floor pattern to visually mark zones while maintaining cohesive finishes throughout.
Smart Space Planning Strategies
You will prioritize light, storage, and appliance placement to make the kitchen feel larger, work efficiently, and read as high-end. Focus on window orientation, layered storage, and integration of appliances into cabinetry for a refined, functional result.
Maximizing Natural Light
Place primary work zones—sink, prep, and cooking—along walls with the most daylight. South- or west-facing windows give strong afternoon light; north-facing glazing provides steady, soft illumination that won’t wash out finishes. If full windows aren’t possible, specify tall, narrow clerestory windows above cabinets to admit light without sacrificing wall storage.
Use reflective surfaces to amplify daylight: gloss-finish upper cabinets, light-toned quartz backsplashes, and a pale, low-absorption floor finish help bounce light into corners. Fit motorized shades or translucent roller blinds to control glare while maintaining privacy. Consider a skylight or light tube over the island when roof geometry allows it.
Integrating Storage Solutions
Plan storage by task: designate drawers for cutlery, deep drawers for pots, and pull-out trays for pantry items near the cooking zone. Use full-height pantry cabinets with adjustable shelves and built-in spice racks to keep frequently used items within arm’s reach. Include narrow vertical pull-outs beside ovens for trays and baking sheets.
Mix visible and concealed storage to balance display and clutter control. Reserve open shelving or glass-front cabinets for curated dishware and back-of-cupboard storage for bulk items. Add drawer organizers, tilt-out sink trays, and recessed toe-kick drawers to increase usable volume without increasing footprint.
Incorporating Built-In Appliances
Position the refrigerator, oven, and dishwasher according to workflow: fridge near the entrance for grocery drop-off, oven and microwave stacked at eye level for ergonomics, dishwasher adjacent to the sink for efficient load cycles. Choose panel-ready appliances that accept custom cabinet faces to preserve clean lines and consistent materiality.
Opt for built-in cooktops with integrated downdraft vents or concealed hoods to keep sightlines open. Specify a built-in espresso machine or warming drawer in a dedicated beverage or scullery wall to separate mess from the main entertaining area. Ensure service access panels and ventilation clearances are planned in the cabinetry layout to avoid costly retrofits.
Elegant Finishes and Materials Selection
Choose materials that balance visual luxury with durability and maintenance ease. Prioritize surfaces that resist stains and scratches, cabinetry built for longevity, and flooring that matches traffic and cleaning needs.
Marble and Stone Surfaces
Marble and engineered stone give a high-end visual anchor for islands, countertops, and backsplashes. Select honed or leathered finishes if you want finger-print resistance and softer sheen; polished marble shows veins vividly but needs more careful maintenance.
For countertops, quartz (engineered stone) offers consistent veining, superior stain resistance, and lower porosity than natural marble—ideal near sinks and prep zones. Use natural marble for visual focal points like a waterfall island or feature wall where heat and acidic spills are less frequent.
Specify edge profiles (eased, bevel, or waterfall) to match your design language and to reduce chip risk. Seal natural stone periodically and plan for sacrificial cutting boards or designated prep areas to preserve appearance. Consider matching or contrasting grout and veining to control visual continuity.
Premium Cabinetry Options
Invest in solid hardwood frames with plywood box construction to ensure structural stability and long-term function. Use soft-close hinges and full-extension drawers with under-mounted slides for smoother access and better load distribution.
For visible faces, choose veneer over laminate if you want authentic wood grain with fewer seams; use lacquer or polyurethane finishes for high-moisture resistance. Apply vertical grain patterns on tall units to emphasize height, and horizontal grain on base cabinets to widen the visual field.
Integrate concealed pull systems or slim brass hardware for a refined look. Specify moisture-resistant interiors for cabinets near sinks and choose pull-out organizers, spice racks, and appliance garages to keep countertops uncluttered and functional.
Luxury Flooring Choices
Select flooring that handles heavy foot traffic, spills, and frequent cleaning without losing its finish. Large-format porcelain tile with rectified edges mimics natural stone while offering superior scratch and stain resistance—ideal for zones around range and sink.
Engineered hardwood provides the warmth of solid wood with better dimensional stability in humid climates; choose a 6–8mm wear layer for future refinishing. For radiant heating, confirm compatibility—porcelain and engineered wood both work well.
Use transition trims between materials to delineate zones, and pick slip-resistant finishes in work corridors. Factor in maintenance: sealed stone and porcelain require simple cleaning, while wood needs periodic refinishing and attention to moisture control.
Modern Technology for the Luxury Kitchen
Expect appliances and systems that save time, reduce waste, and create consistent results while reinforcing a high-end aesthetic. Focus on reliable brands, built-in integration, and controls that match your daily routines.
Smart Kitchen Appliances
Choose built-in ovens with steam and convection presets that store your favorite recipes for repeatable results. Look for refrigeration with dual compressors and temperature zones that maintain produce, meat, and wine at optimal humidity and temperature levels. Dishwashers with targeted spray zones and low-noise insulation protect your open-plan living areas.
Prioritize appliances that support firmware updates and have clear, local physical controls alongside app access. Consider induction cooktops with integrated downdraft vents to eliminate the need for an island hood. For convenience, add a smart coffee system and a meal-prep drawer with precise humidity control to streamline daily tasks.
Integrated Lighting Systems
Layer lighting for function and mood: task lights under cabinets, accent LED strips in toe-kicks and glass cabinets, and dimmable ceiling fixtures for overall illumination. Use tunable white LEDs in work zones to switch between warm light for entertaining and cool light for detailed prep.
Install lighting controls that let you program scenes—morning prep, dinner service, or cleaning—accessible via wall keypads, voice, or an app. Specify CRI 90+ fixtures for accurate color rendering on food and surfaces. Include motion-triggered strips inside cabinets and soft-step lights for safe nighttime access.
Home Automation Features
Connect appliances, lighting, HVAC, and security into one control platform you can manage from a wall hub or mobile device. Automate routines like preheating ovens when you leave work, lowering blinds and reducing HVAC load during summer, or running exhaust and lighting when the cooktop detects high heat.
Choose systems that use local processing for critical functions and encrypted cloud services for remote access. Integrate voice control for hands-free commands, but keep physical overrides to avoid dependence on speech recognition. Finally, prioritize interoperability—Zigbee, Z-Wave, or Matter-compatible devices—to protect your investment and simplify future upgrades.
Personalizing Kitchen Design in Luxury Homes
Focus on features that reflect how you use the kitchen and how you want it to feel. Prioritize materials, appliances, and lighting that support your routines and aesthetic preferences.
Custom Features and Details
Choose materials and hardware that match your lifestyle: select honed marble or engineered quartz for low-maintenance countertops if you cook daily, or bookmatched marble for visual drama if the kitchen hosts guests. Specify custom cabinetry with integrated storage solutions—appliance garages, pull-out pantries, spice drawers with inserts, and built-in knife blocks—to keep surfaces clear and workflows smooth.
Consider bespoke appliances sized to your needs: a pro‑style range with dual ovens if you entertain often, or a concealed column refrigerator to preserve sightlines. Add personalized finishes like matte black faucet hardware, leathered island edges, or inlaid wood flooring patterns to reinforce your design language. Finally, plan sightlines and tactile moments—contrasting textures on islands, soft‑close hinges, and under‑cabinet toe‑kick lighting—for daily comfort and a tailored feel.
Statement Lighting Fixtures
Pick lighting that performs and defines the space. Install layered lighting: high‑output recessed cans for task zones, LED under‑cabinet strips for prep surfaces, and dimmable ambient fixtures for mood control. Use color‑temperature control (2700–3500K) to shift from warm entertaining light to cooler prep light when needed.
Choose a showpiece over the island—an oversized chandelier, linear suspension with integrated LEDs, or a cluster of blown‑glass pendants—that ties to your finishes and scales to the island length. Specify glare‑reducing diffusers and adjustable suspension heights to balance form and function. Add accent lighting inside glass cabinets and toe‑kick LEDs to highlight materials and improve safety without overpowering the room.
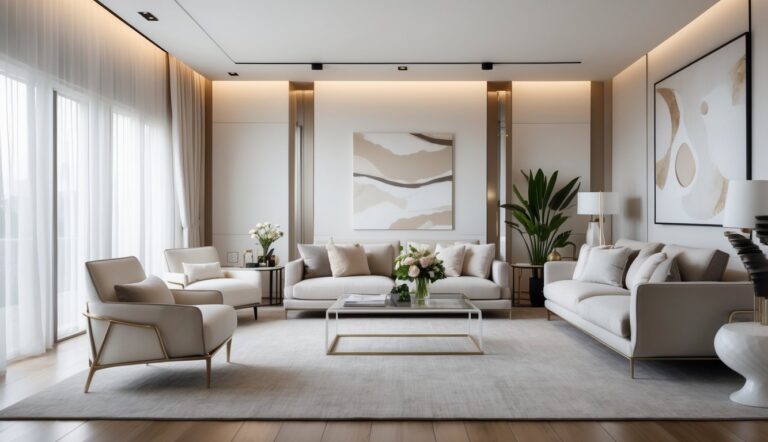
Seamlessly Connecting Kitchen to Living Spaces
Maintain visual continuity, control sightlines, and plan circulations that let people move from food prep to dining and lounging without congestion. Prioritize a clear route for service, compatible finishes, and layered lighting to support multiple activities.
Flow Between Kitchen and Dining Areas
Place the main prep zone within 3–5 meters of the dining table to minimize carrying distance and spills. Use an island or peninsula as a dedicated pass-through: one side for prep and sink, the other with seating and a clear 90–120 cm aisle for serving and foot traffic.
Select flooring that runs continuously between spaces—stone or wide-plank wood—to unify the rooms while choosing rugs under the table to define dining limits.
Define sightlines by aligning tall cabinetry along secondary walls and keeping sight corridors open toward seating areas. Use coordinated materials—quartz counters that echo the dining table finish or matching metal finishes on lighting—to create a cohesive look without identical repetition.
Install layered lighting: bright task lights over prep zones, a dimmable pendant or chandelier over the table, and adjustable ambient fixtures in the living zone so each area functions independently yet feels connected.
Designing Indoor-Outdoor Access
Situate a wide sliding or folding door at the transition point between kitchen/dining and the patio to create a continuous entertaining zone. Choose door systems with large glass panels and minimal frames to maximize daylight and visual connection, while specifying thermally broken frames to maintain energy performance.
Create a covered threshold area outside with a durable surface like porcelain pavers that align with interior flooring height to avoid steps. Add a dedicated outdoor prep station or wet bar opposite the indoor sink to shorten routes when serving outdoors and to keep ashtrays, garbage, and heavy items outside.
Plan for weather-ready furnishings and retractable shading so the outdoor extension serves as a true room in spring through fall. Include exterior lighting controlled from the kitchen for safe evening flow and immediate task illumination when carrying plates or drinks.
Sustainable and Timeless Design Choices
Choose materials and layouts that reduce maintenance, lower operating costs, and age gracefully. Prioritize non-toxic finishes, durable surfaces, efficient appliances, and a layout that supports changes in technology and lifestyle.
Eco-Friendly Materials
Select countertops like quartz or recycled-glass composites that resist staining and don’t need sealants. These materials reduce long-term maintenance and often contain post-consumer content. For cabinetry, opt for FSC-certified hardwood or formaldehyde-free plywood to minimize indoor pollutants and ensure legal, sustainable sourcing.
Use low-VOC paints and water-based sealants on walls and trim to cut off-gassing. Consider reclaimed wood or bamboo for accents; both add warmth while lowering the demand for new timber. Finally, choose hardware and finishes with high recycled-metal content and durability ratings to avoid frequent replacements.
Long-Lasting Layout Solutions
Design islands, work triangles, and appliance zones to be adaptable: allocate space for a built-in double oven or future induction range without major rework. Center the sink and prep area with at least 900–1200 mm of continuous countertop on one side to accommodate changing cooking styles and small built-in appliances.
Plan plumbing and electrical runs in accessible chaseways so you can upgrade fixtures or add a second refrigerator with minimal demolition. Include modular storage: adjustable shelving, pull-out pantries, and deep drawers sized for standard bin systems. These choices keep the kitchen functional as equipment and household needs evolve.
Professional Insights for Designing Luxury Kitchens
You should begin with a clear layout that prioritizes workflow and sightlines. Plan zones for cooking, prep, storage, and socializing so movement feels natural and efficient.
Select materials that balance aesthetics and durability. Marble, hardwood, and metal accents create an upscale palette; choose honed or sealed finishes to reduce maintenance and staining.
Lighting shapes mood and function. Use layered lighting: recessed task lights, under-cabinet strips, and statement pendant fixtures over islands to support tasks and create atmosphere.
Appliances affect both performance and visual impact. Invest in high-quality, energy-efficient units sized to your needs, then integrate or frame them to maintain continuous sightlines.
Customize storage to reduce clutter and optimize accessibility. Pull-out drawers, vertical dividers, and appliance garages keep counters clear while supporting your daily routines.
Consider scale and proportion in all elements. Counter heights, island dimensions, and aisle widths must suit your household and allow comfortable circulation.
Pay attention to finishes and hardware for cohesive detail. Consistent metal tones, grout choices, and edge profiles elevate the design without adding complexity.
Budget strategically by prioritizing visible, long-lasting elements first. Spend on durable surfaces and key appliances, then allocate remaining funds to decorative or replaceable components.
Use a simple checklist to guide decisions:
- Define primary functions and user needs.
- Set material and maintenance standards.
- Establish lighting and appliance hierarchy.
- Allocate budget by impact and longevity.