
You can create a kitchen that feels both luxurious and deliberately simple without sacrificing everyday practicality. Focus on clean lines, high-quality materials, and smart storage to achieve a timeless, high-end minimalist kitchen that actually works for daily life. This approach keeps the space elegant while making cooking, cleaning, and entertaining easier.
Expect practical guidance on arranging your layout for flow and efficiency, choosing durable finishes and integrated appliances, dialing in lighting for mood and task, and adding subtle decorative touches that signal luxury without clutter. You’ll also find tips to personalize the design and maintain long-term value so your kitchen remains both beautiful and functional.
Core Principles of Luxury Minimalist Kitchen Design
Keep finishes intentional, storage efficient, and circulation clear. Prioritize tactile materials, uncluttered sightlines, and appliance placement that supports how you cook and entertain.
Balancing Sophistication and Simplicity
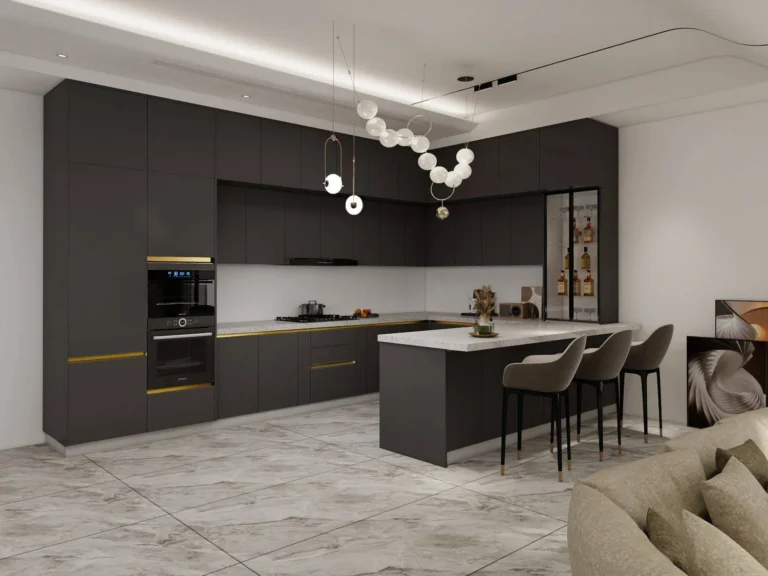
Choose a restrained palette—two to three colors maximum—to maintain elegance without visual noise. Pair a neutral base (white, warm gray, or deep charcoal) with one premium accent like honed marble, matte brass, or dark walnut to add depth.
Limit visible hardware and ornamentation. Use integrated handles, slab-front cabinets, and concealed hinges so surfaces read clean and uninterrupted. Let texture and finish do the work: a silk-matte cabinet face against a subtly veined countertop creates sophistication without extra detail.
Control lighting deliberately. Combine undercabinet task strips, dimmable pendant fixtures over an island, and toe-kick or valance ambient lighting to sculpt the space. Each light source should have a clear purpose to avoid cluttered effect.
Key Elements of Minimalist Luxury
Invest in high-quality materials that age well and require minimal maintenance. Prioritize durable stone or engineered surfaces for countertops, solid-core cabinetry, and brushed-metal fixtures that resist fingerprints.
Streamline storage around function. Use full-extension drawers for pots, vertical dividers for baking trays, and pull-out pantry units. A combination of open shelves near prep zones and closed storage elsewhere keeps essentials accessible but out of sight.
Select appliances that match the aesthetic and performance you need. Opt for panel-ready refrigerators and integrated range hoods to maintain seamless lines. Choose a powerful, quiet ventilation system and a range or cooktop sized to your routine rather than the largest model available.
Functional Layout Strategies
Plan work triangles and zones according to real tasks: prep (sink + counter), cooking (range), and storage (fridge + pantry). Keep the most frequent pathway between sink and stove under 1.2–2 meters to reduce steps during meal prep.
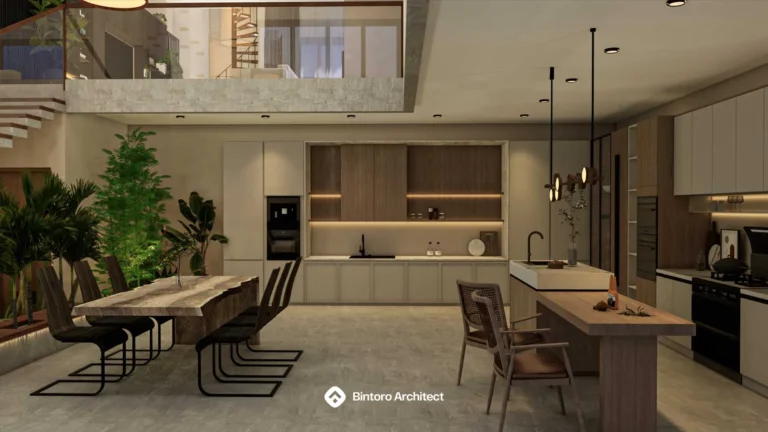
Use islands as multifunctional hubs: include recessed prep sinks, under-counter refrigeration, or hidden waste sorting to centralize tasks. Allow at least 1.1 meter clearance around islands for comfortable movement and appliance door swing.
Integrate ergonomics into storage placement. Store daily-use items between waist and eye level. Reserve lower deep drawers for heavy cookware and install soft-close mechanisms to protect finishes.
Space Optimization for Functional Kitchens
You’ll prioritize storage that keeps surfaces clear, arrange zones to shorten walking and reach, and use vertical or multi-use elements to expand usable area without clutter.
Smart Storage Solutions
Use deep drawers for pots and pans; fit them with removable dividers so you can stack lids vertically and pull items out easily. Install pull-out pantry shelves at varying heights for dry goods and small appliances; label shelves to speed retrieval and reduce overbuying.
Add overhead cabinets to ceiling height to store seldom-used items; include a step-stool tucked into a lower cabinet for safe access. Use under-sink pull-outs for cleaning supplies and a slim pull-out trash bin next to prep areas to keep waste out of sight.
Consider built-in spice racks beside the cooktop and a magnetic knife strip mounted on the backsplash. These choices keep countertops clear and make frequent items immediately reachable.
Efficient Workflow Zones
Define three core zones: prep (sink and counter), cook (stove and adjacent counter), and clean (dishwasher and drying area). Place the most-used tools for each zone within a single arm’s reach to cut steps and speed routine tasks.
Keep knives, cutting boards, and mixing bowls in the prep zone. Store pots, pans, and spatulas next to the cooktop. House plates and glassware near the dishwasher for quick unloading.
Measure the distance between zones and aim for short, unobstructed paths—typically 60–120 cm between each main station works well. Use task lighting over zones to reduce errors and increase safety.
Maximizing Limited Space
Use vertical space: open shelving above counters for attractive everyday items, and tall slim cabinets for brooms or sheet pans. Choose a narrow rolling island that tucks against a wall when not in use but provides extra prep surface and storage when needed.
Select multi-functional furniture such as a drop-leaf table that doubles as a dining spot and prep area. Install fold-down or pull-out counters near appliances to create temporary workspace without permanent footprint.
Opt for appliances sized to your needs—a 24-inch dishwasher or compact convection oven can free up cabinetry. Finally, keep visible surfaces minimal: consistent container styles, cleared counters, and integrated outlets prevent visual clutter and make the kitchen feel larger.
Material and Finish Selection
Choose materials that balance durability, maintenance, and visual impact. Prioritize surfaces that resist stains and scratches, colors that remain timeless, and fixtures that age well while matching your kitchen’s scale.
Premium Surface Materials
Select countertops that pair function with luxury. Quartz provides non-porous durability and low maintenance; pick a honed or subtle veining finish for a refined look. If you prefer natural stone, go for honed or leathered granite or marble in moderated veining to hide wear and reduce visible staining.
For cabinets, use high-density plywood or MDF with a lacquer or thermofoil finish for consistent flatness and fewer seams. Solid wood face frames work well for island accents but avoid full solid-wood construction in humid climates. For backsplashes and wet zones, porcelain slabs or large-format ceramic tiles reduce grout lines and simplify cleaning.
Floors should handle traffic and spills: choose porcelain tile, engineered hardwood with a durable finish, or luxury vinyl plank with an enhanced wear layer. Specify minimum PEI 4 for tiles in heavy-use kitchens. Sealants and edge treatments matter—use eased or beveled edges rather than fragile bullnose on high-use counters.
Timeless Color Palettes
Adopt a restrained palette with one dominant neutral, one accent, and one material tone. For example: warm white cabinetry, matte black island base, and natural oak open shelving. This combination reads modern yet enduring.
Stick to paint and finish samples under various lighting—north-facing kitchens need warmer whites; south-facing spaces can handle cooler grays. Use undertone matching: a white with blue undertones clashes with warm wood, while a creamy white complements oak and brass.
Limit high-contrast color blocks to focal elements such as an island or backsplash. Keep visible appliances and trim in coordinated finishes—matte black or stainless steel—to maintain visual cohesion. Test full-size panels before committing.
Elegant Fixture Choices
Pick faucets, handles, and lighting that perform well and visually anchor your kitchen. Choose single-handle pull-down faucets with ceramic cartridges and a spray function for everyday efficiency. Finish options like brushed nickel, satin brass, or matte black resist fingerprints better than polished chrome.
Cabinet hardware should match scale; use slim bar pulls on flat-panel doors and inset knobs on framed cabinetry. Opt for soft-close hinges and full-extension drawer runners rated for at least 100 lb capacity.
For lighting, layer task, ambient, and accent: under-cabinet LED strips (3000–3500K) for prep, pendant lighting over islands with dimmable drivers, and recessed ambient lighting with CRI ≥ 90 for accurate color rendering. Specify integrated LEDs where possible to reduce maintenance and ensure consistent color temperature across fixtures.
Modern Appliances and Integrated Technology
Choose appliances and tech that hide in plain sight while improving workflow, energy use, and visual harmony. Prioritize built-in layouts, quiet performance, and controls that integrate with your daily routines.
Seamless Built-In Appliances
Built-in ovens, refrigerators, and dishwashers create an uninterrupted cabinet line and reduce visual clutter. Select panel-ready models so cabinet doors match seamlessly; for a premium look, use full-height integrated fridges with multi-zone temperature control to store produce, dairy, and beverages separately.
Plan appliance placement using the kitchen work triangle but adapt it for modern needs: place the oven and microwave near food prep surfaces, and the dishwasher close to the sink for efficient unloading. Choose flush-mounted cooktops and downdraft vents if you want a clean island surface without an overhead hood. Pay attention to door swing, service access panels, and ventilation clearances during design to avoid costly changes later.
Consider finishes that conceal fingerprints and scratches—matte lacquer or textured laminate works better than high-gloss in high-use areas. Finally, size appliances to match household habits: a 24-inch dishwasher fits couples, while families often need 24–30+ inch capacity and flexible racks.
Smart Kitchen Innovations
Add smart ovens, voice-enabled faucets, and app-connected refrigerators to streamline tasks and reduce waste. Look for ovens with remote preheat, recipe-guided cooking, and probe thermostats that send notifications to your phone when food hits target temperature.
Install smart faucets with touch or motion controls to reduce cross-contamination and save water. Choose refrigerators that monitor contents, suggest recipes, and offer adjustable humidity drawers to extend produce life. Integrate appliances with a central smart-home hub (Matter, Zigbee, or Wi‑Fi) so you can run routines—like turning on undercabinet lights and preheating the oven with a single command.
Prioritize security and updates: buy brands that provide firmware patches and clear privacy policies. Also weigh energy features such as inverter compressors, eco modes, and standby power draw to lower bills without sacrificing performance.
Lighting for Ambiance and Function
Balance brightness, direction, and color temperature to make cooking safe and surfaces look upscale. Combine hidden task lights with a few decorative pieces to keep the kitchen both highly usable and visually refined.
Layered Lighting Concepts
Use three lighting layers: general, task, and accent. Install recessed downlights or a linear ceiling fixture for uniform general lighting at 300–400 lux. Add under-cabinet LED strips (2700–3500K) to illuminate countertops and remove shadows while you prep. Place adjustable pendant or track spots over the island for targeted task light and flexibility.
For accents, include toe-kick LEDs, interior cabinet lights, or small wall washers to highlight materials like marble backsplashes or open shelving. Use separate circuits and dimmers so you can mix layers—bright for cooking, softer for dining. Choose CRI ≥90 to render food and finishes accurately.
Statement Lighting Fixtures
Pick one or two focal fixtures that reflect your style without overpowering the room. A sculptural chandelier above an island or a row of oversized pendants can act as both task light and centerpiece. Match scale to island length: pendants should span roughly two-thirds of the island and sit 30–36 inches above the countertop.
Select finishes that coordinate with hardware and metal accents—brushed brass for warmth, matte black for contrast, or polished chrome for a contemporary look. Prefer dimmable LED versions with warm white tones (2700–3000K) to keep the atmosphere inviting while saving energy.
Luxury Decor Touches
Add selective high-quality pieces and natural textures to create an elegant, lived-in kitchen. Focus on items that age well, require minimal maintenance, and enhance daily use.
Artisan Accessories
Choose handcrafted hardware and statement lighting to lift the room without clutter. Replace standard cabinet pulls with solid brass or matte-black forged handles; they resist wear and add tactile weight. Install a hand-blown glass pendant or a low-profile brass chandelier over the island for focused task light and a visual anchor.
Use functional art: a wooden cutting board carved by a local maker, a forged-steel trivet, or ceramic canisters with subtle glazes. These items serve daily purposes while adding texture and provenance. Limit decorative accessories to three to five curated pieces so surfaces stay uncluttered and cleaning stays easy.
Keep finishes consistent across accessories to maintain a cohesive look. For example, match the metal tone of faucets, handles, and light fittings. That small coordination creates a luxury impression without needing expensive renovation.
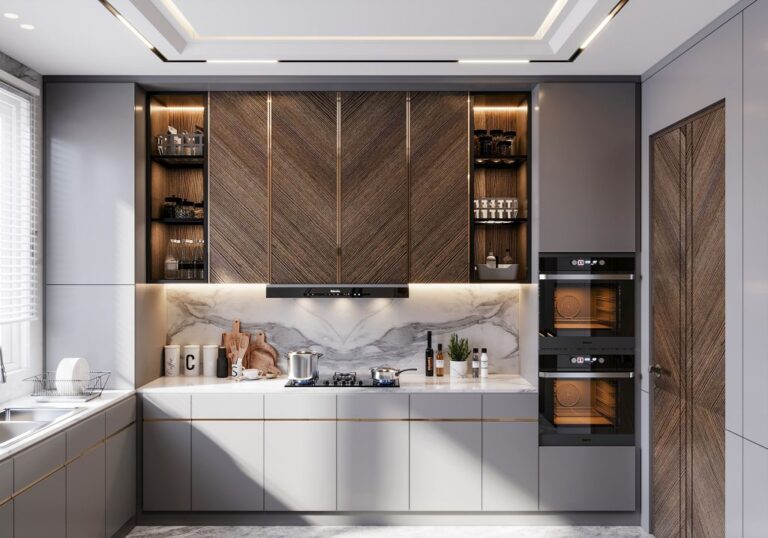
Natural Elements for Warmth
Bring warmth with durable natural materials that contrast sleek cabinetry. A full-height marble backsplash behind the stove or a honed stone countertop introduces veining and depth. Choose honed or leathered finishes to reduce reflectivity and hide water spots.
Incorporate warm wood in open shelving, a butcher-block prep surface, or a walnut breakfast bar. Prefer hardwoods with tight grain and an oil finish for resilience and easy touch-ups. Add greenery in heat-tolerant pots—rosemary, bay laurel, or a snake plant—to soften corners and improve air quality.
Textiles matter: a low-pile wool runner near the sink cushions standing work and defines the cooking zone. Select neutral tones and subtle patterns so textiles complement rather than compete with stone and metal.
Ensuring Comfort and Practicality
Balance form and function by prioritizing workflow. Arrange the sink, stove, and refrigerator in a compact triangle to reduce steps while cooking. Keep commonly used items within arm’s reach.
Choose ergonomic heights and handles to reduce strain. Countertops at 90–95 cm suit most users; soft-close drawers and pull-out shelves improve access and comfort. Add a comfortable anti-fatigue mat where you stand longest.
Maximize storage with multifunctional solutions. Use deep drawers for pots, vertical dividers for baking sheets, and hidden compartments for small appliances. Consistent, labeled containers keep the space tidy and visually calm.
Control lighting for both task and ambiance. Bright, focused lighting over prep zones prevents accidents, while warm indirect light creates a luxurious atmosphere. Install dimmers so you can adjust light levels easily.
Keep ventilation effective to maintain air quality. A properly sized range hood removes odors and moisture, protecting finishes and fabrics. Consider a quiet model to preserve conversation and relaxation in adjacent living areas.
Use durable, low-maintenance materials for lasting practicality. Quartz or granite counters resist stains; matte or semi-gloss finishes hide fingerprints better than high gloss. Select finishes that match your aesthetic without demanding constant care.
- Essentials checklist:
- Ergonomic countertop height
- Task and ambient lighting with dimmers
- Quiet, efficient ventilation
- Multifunctional storage solutions
- Durable, low-maintenance surfaces
These choices help your kitchen feel both luxurious and livable every day.
Personalization for Distinctive Style
You can make a minimalist luxury kitchen feel uniquely yours by adding a few deliberate personal touches. Focus on one or two accent elements so the space stays calm and cohesive.
Choose finishes and materials that reflect your taste: matte black hardware for a modern edge, warm wood veneers for a softer look, or a marble-patterned countertop for classic refinement. Mix textures—metal, stone, and wood—to create depth without clutter.
Display a small curated selection of items that matter to you, such as artisanal cookware, a favorite tea set, or framed recipe cards. Keep these items grouped and elevated on open shelves or a designated niche to maintain the minimalist aesthetic.
Use lighting as both function and signature. Install pendant lights over an island in a distinctive shape or finish, and add warm under-cabinet LEDs to highlight task areas. Dimmable controls let you shift mood while preserving practicality.
Consider a limited palette of accent colors to tie accessories to the overall scheme. A single bold hue in bar stools, a rug, or a backsplash tile can read as intentional rather than busy.
Quick checklist:
- Pick 1–2 signature materials or finishes.
- Curate a visible collection of meaningful items.
- Add distinctive, functional lighting.
- Use a restrained accent color to unify the look.
These choices help you achieve a refined, personal kitchen that remains functional and visually balanced.
Maintenance and Long-Term Value
Keep finishes and appliances clean to protect appearance and function. Wipe countertops and backsplashes daily with recommended cleaners, and address spills quickly to prevent staining or damage.
Schedule routine checks for appliances and plumbing every 6–12 months. Simple tasks—tightening hinges, replacing seals, and descaling faucets—extend lifespan and avoid costly repairs.
Choose durable materials that balance aesthetics and longevity. Quartz or engineered stone resists stains and scratching, while matte or semi-gloss cabinet finishes hide wear better than high-gloss in busy kitchens.
Invest in quality hardware and soft-close mechanisms. They reduce noise, prevent cabinet stress, and maintain a premium feel over time.
Track maintenance costs and updates to preserve resale value. A basic log helps you show prospective buyers the kitchen received regular care and timely upgrades.
Practical styling keeps the space minimal and timeless. Use uniform storage containers and limit decorative items so wear concentrates on functional elements, not fragile accents.
Maintenance checklist (quarterly):
- Clean seals and gaskets
- Inspect grout and caulking
- Service extraction hood filter
Minor investments in preventive care often yield higher long-term value. You protect both your daily experience and the kitchen’s market appeal when you maintain functionality and a consistent, high-quality look.